HeyGen API Documentation (Complete)
Generated: 2025-09-18 10:44:59
Table of Contents
- Quick Start
- Create Avatar Videos
- Customize Video Background
- Using Audio Source as Voice
- Generate Video from Template
- Video Translate API
- Streaming API Overview
- Streaming Avatar SDK
- Firewall Configuration
- Interactive Avatar API - Avatar Version Deprecation Notice
- Bulk Video Translation
- HeyGen OAuth
- HeyGen MCP Server
Quick Start
Source: https://docs.heygen.com/docs/quick-start Generated: 2025-09-18 10:44:27
Welcome to the HeyGen API! 🙌
HeyGen API expands what you can do with HeyGen , allowing you to create amazing avatar videos programmatically and integrate HeyGen's powerful AI capabilities into your product. Unleash the potential of HeyGen's AI capabilities! Welcome to the future of video creation – happy AI video making!
📘
Note:
The HeyGen API is now offered independently from the HeyGen App!
Your HeyGen App plan - Free , Creator , Team , or Enterprise - determines which features and limits you can use on the app.heygen.com web app.
Every HeyGen App user now automatically receives Free Trial access to the HeyGen API, including Video Generation, Video Translation, and Interactive Avatar endpoints, and there are three paid subscription tiers available for increased usage: Pro , Scale , and Enterprise.
For more information on pricing and usage, please refer to ourlimits page.
Prerequisite
Create a HeyGen account
Create a HeyGen account. After you create a HeyGen account, you are able to make professional avatar videos by leveraging HeyGen's powerful AI capabilities.
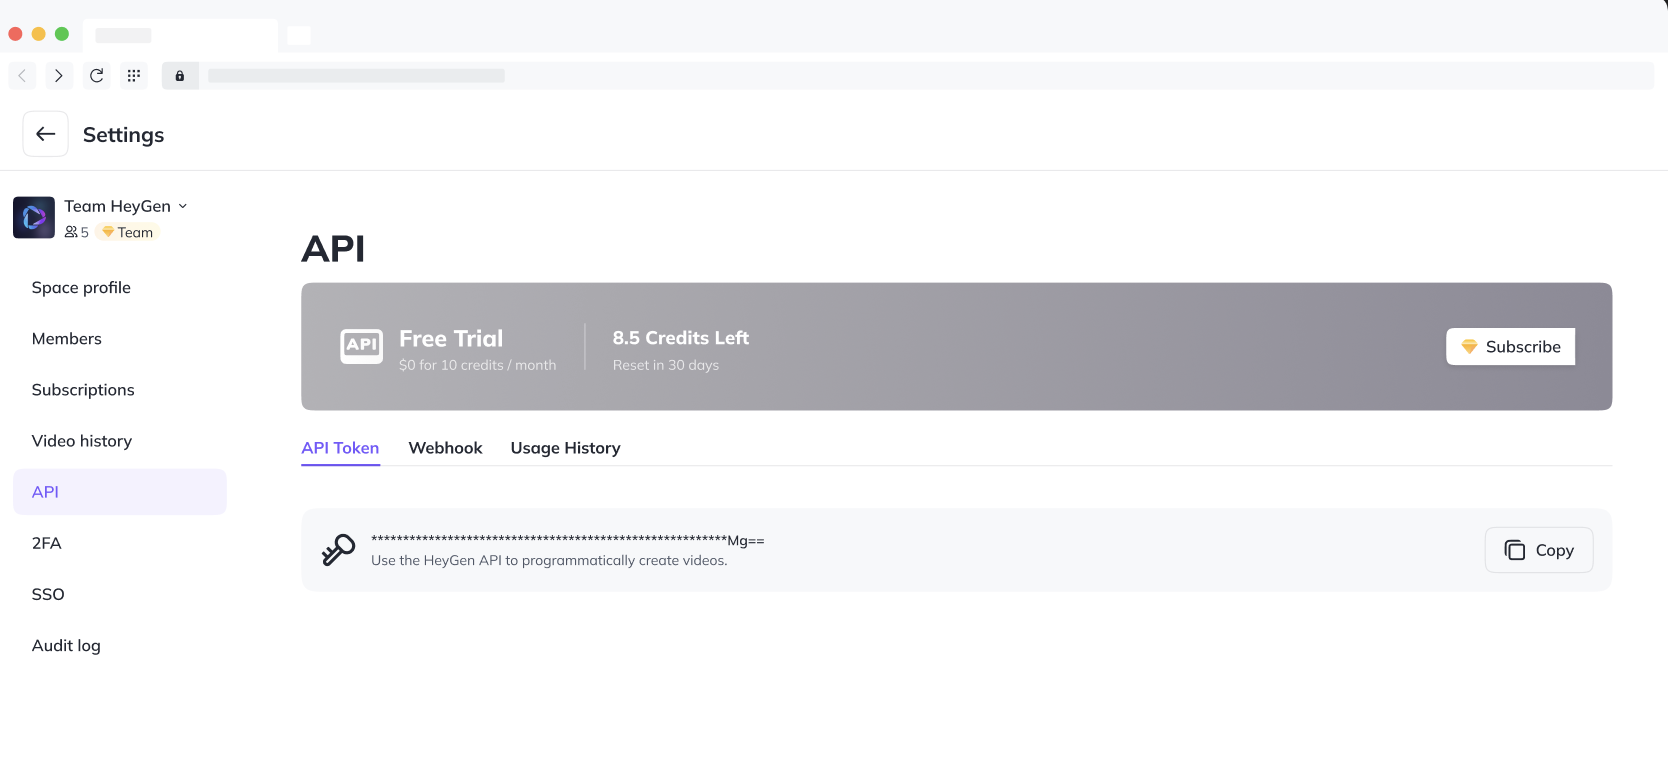
Access your API key
After you have registered the HeyGen account, proceed to your account settings and scroll down to the Subscriptions section and copy your API token.
Settings > Subscriptions > HeyGen API > API Token
Quickly Create Avatar Video
See detailed API reference
You can use the video/generate endpoint of the HeyGen API to programmatically create mp4 files featuring HeyGen's realistic AI Avatars. In the below example, we create a video in test mode.
While still on aFree Trial of the HeyGen API , your videos will be watermarked.
RequestResponse
curl -X POST 'https://api.heygen.com/v2/video/generate' \
-H 'X-Api-Key: <your-api-key>' \
-H 'Content-Type: application/json' \
-d '{
  "video_inputs": [
    {
      "character": {
        "type": "avatar",
        "avatar_id": "Daisy-inskirt-20220818",
        "avatar_style": "normal"
      },
      "voice": {
        "type": "text",
        "input_text": "Welcome to the HeyGen API!",
        "voice_id": "2d5b0e6cf36f460aa7fc47e3eee4ba54"
      },
      "background": {
        "type": "color",
        "value": "#008000"
      }
    }
  ],
  "dimension": {
    "width": 1280,
    "height": 720
  }
}'

{
  "error": null,
  "data": {
    "video_id": "<video_id>"
  }
}
You will receive a response with the ID of the newly created video. You can also use the input_audio attribute to pass a public audio URL instead of using the input_text attribute.
You can also use the Template endpoint in order to generate similar videos in bulk. Click here to find out how.
Wait for the Video
See detailed API reference
After creating your video, you can check its status. When the video is ready, the status will change to completed.
RequestResponse (Completed)Response (Processing)Response (Pending)Response (Failed)
curl -X GET 'https://api.heygen.com/v1/video_status.get?video_id=<video_id>' \
-H 'X-Api-Key: <your-api-key>'

{
  "code": 100,
  "data": {
    "callback_id": null,
    "caption_url": "<caption_url>",
    "duration": 1.234,
    "error": null,
    "gif_url": "<gif_url>",
    "id": "<id>",
    "status": "completed",
    "thumbnail_url": "<thumbnail_url>",
    "video_url": "<video_url>",
    "video_url_caption": null
  },
  "message": "Success"
}

{
  "code": 100,
  "data": {
    "callback_id": null,
    "caption_url": null,
    "duration": null,
    "error": null,
    "gif_url": null,
    "id": "<id>",
    "status": "processing",
    "thumbnail_url": null,
    "video_url": null,
    "video_url_caption": null
  },
  "message": "Success"
}

{
  "code": 100,
  "data": {
    "callback_id": null,
    "caption_url": null,
    "duration": null,
    "error": null,
    "gif_url": null,
    "id": "<id>",
    "status": "pending",
    "thumbnail_url": null,
    "video_url": null,
    "video_url_caption": null
  },
  "message": "Success"
}

{
  "code": 100,
  "data": {
    "callback_id": null,
    "caption_url": null,
    "duration": null,
    "error": {
      "code": 40119,
      "detail": "Video is too long (> 3600.0s). Please upgrade your plan to generate longer videos",
      "message": "Video is too long"
    },
    "gif_url": null,
    "id": "<id>",
    "status": "failed",
    "thumbnail_url": null,
    "video_url": null,
    "video_url_caption": null
  },
  "message": "Success"
}
📘
The video file URL you get will expire in 7 days. 📆
You can observe this expiration in the URL parameters. Every time you call the video status endpoint, the
Expiresand other queries are regenerated accordingly.
Download the video
Once your video is ready, you can find a link in the response for you to download the video.
cURLPython
curl <video_url> --output first_video.mp4

...
video_status_url = f"https://api.heygen.com/v1/video_status.get?video_id={video_id}"
while True:
    response = requests.get(video_status_url, headers=headers)
    status = response.json()["data"]["status"]

    if status == "completed":
        video_url = response.json()["data"]["video_url"]
        thumbnail_url = response.json()["data"]["thumbnail_url"]
        print(
            f"Video generation completed! \nVideo URL: {video_url} \nThumbnail URL: {thumbnail_url}"
        )

        # Save the video to a file
        video_filename = "generated_video.mp4"
        with open(video_filename, "wb") as video_file:
            video_content = requests.get(video_url).content
            video_file.write(video_content)
        break

    elif status == "processing" or status == "pending":
        print("Video is still processing. Checking status...")
        time.sleep(5)  # Sleep for 5 seconds before checking again

    elif status == "failed":
        error = response.json()["data"]["error"]
        print(f"Video generation failed. '{error}'")
        break
Conclusion
For a comprehensive understanding of HeyGen APIs and their capabilities, please review our detailedAPI reference.
In conclusion, the HeyGen API empowers you to tap into the remarkable AI capabilities of HeyGen for programmatically generating compelling avatar videos. By creating a HeyGen account and using your API Token, you can explore the vast potential of HeyGen's API to infuse creativity into your business, product, or creative project.
__Updated 4 months ago
Ask AI
Create Avatar Videos
Source: https://docs.heygen.com/docs/create-video Generated: 2025-09-18 10:44:28
Create personalized avatar videos with ease using the HeyGen API. This step-by-step guide will walk you through the process of selecting avatars, voices, and generating captivating videos for a wide range of applications. Whether you need videos for education, entertainment, or marketing , the HeyGen API makes it simple and efficient.
1. Get List of Avatars and Voices
To generate an avatar video, you'll need an avatar and a voice. You can fetch a list of available avatars and voices. For this we need to use List Avatars and List Voices API endpoints.
List Avatars
See detailed API reference
Use this API to obtain a list of available avatars , including your instant avatars. This API call will provide you with a list of avatars. Choose one avatar from the list and note down its avatar_id for the next steps.
RequestResponse
curl --request GET \
     --url https://api.heygen.com/v2/avatars \
     --header 'Accept: application/json' \
     --header 'X-Api-Key: <your-api-key>'

{
  "error": null,
  "data": {
    "avatars": [
      {
        "avatar_id": "<avatar_id>",
        "avatar_name": "My Instant Avatar",
        "gender": "male",
        "preview_image_url": "<preview_image_url>",
        "preview_video_url": "<preview_video_url>"
      },
      {
        "avatar_id": "Angela-inblackskirt-20220820",
        "avatar_name": "Angela in Black Dress",
        "gender": "female",
        "preview_image_url": "<preview_image_url>",
        "preview_video_url": "<preview_video_url>"
      },
    ]
  }
}
List Voices
See detailed API reference
This API call will provide you with a list of voices. Choose one voice from the list and note down its voice_id for the next steps.
RequestResponse
curl --request GET \
     --url https://api.heygen.com/v2/voices \
     --header 'Accept: application/json' \
     --header 'X-Api-Key: <your-api-key>'

  "error": null,
  "data": {
    "voices": [
       {
        "voice_id": "26b2064088674c80b1e5fc5ab1a068ec",
        "language": "English",
        "gender": "male",
        "name": "Rex",
        "preview_audio": "https://resource.heygen.ai/text_to_speech/bCo7SFtTvcJz6udLqHmUKf.mp3",
        "support_pause": false,
        "emotion_support": true,
        "support_interactive_avatar": true
      },
      {
        "voice_id": "42d598350e7a4d339a3875eb1b0169fd",
        "language": "English",
        "gender": "Male",
        "name": "Paul",
        "preview_audio": "https://static.heygen.ai/voice_preview/gDkZsW4hQZXCqFmUNQPVm4.wav",
        "support_pause": false,
        "emotion_support": true,
        "support_interactive_avatar": true
      },
      ...
    ]
  }
}
Assuming you've selected an avatar and a voice , let's proceed to generate your video.
2. Generate Video
See detailed API reference
To create your avatar video, make a POST request using the following API:
RequestResponse
curl -X POST https://api.heygen.com/v2/video/generate \
-H 'X-Api-Key: <your-api-key>' \
-H 'Content-Type: application/json' \
-d '{
  "video_inputs": [
    {
      "character": {
        "type": "avatar",
        "avatar_id": "Lina_Dress_Sitting_Side_public",
        "avatar_style": "normal"
      },
      "voice": {
        "type": "text",
        "input_text": "Welcome to the HeyGen API!",
        "voice_id": "119caed25533477ba63822d5d1552d25",
        "speed": 1.1
      }
    }
  ],
  "dimension": {
    "width": 1280,
    "height": 720
  }
}'

{
  "error": null,
  "data": {
    "video_id": "<video_id>"
  }
}
Text input should be less than 1500 characters. Here is the limit details.
You can adjust voice attributes such as
speedandpitch. Here is the references.
▫️
If you are on the free API plan, the export resolution limit is 720p. You can set the resolution with the dimension argument as follows:
JSON
  ...
  "dimension": {
    "width": 1280,
    "height": 720
  }
}
You'll receive a video_id in the response. Note down this ID as you will need it to check the video's generation status.
3. Check Video Generation Status
See detailed API reference
After creating your video, you can check its status. Wait until the video's status changes to completed.
RequestResponse (Completed)Response (Waiting)Response (Processing)Response (Pending)Response (Failed)
curl --request GET \
     --url https://api.heygen.com/v1/video_status.get?video_id=<video_id> \
     --header 'Accept: application/json' \
     --header 'X-Api-Key: <your-api-key>'

{
  "code": 100,
  "data": {
    "callback_id": null,
    "caption_url": "<caption_url>",
    "duration": 1.234,
    "error": null,
    "gif_url": "<gif_url>",
    "id": "<id>",
    "status": "completed",
    "thumbnail_url": "<thumbnail_url>",
    "video_url": "<video_url>",
    "video_url_caption": null
  },
  "message": "Success"
}

{
  "code": 100,
  "data": {
    "callback_id": null,
    "caption_url": null,
    "duration": null,
    "error": null,
    "gif_url": null,
    "id": "<id>",
    "status": "waiting",
    "thumbnail_url": null,
    "video_url": null,
    "video_url_caption": null
  },
  "message": "Success"
}

{
  "code": 100,
  "data": {
    "callback_id": null,
    "caption_url": null,
    "duration": null,
    "error": null,
    "gif_url": null,
    "id": "<id>",
    "status": "processing",
    "thumbnail_url": null,
    "video_url": null,
    "video_url_caption": null
  },
  "message": "Success"
}

{
  "code": 100,
  "data": {
    "callback_id": null,
    "caption_url": null,
    "duration": null,
    "error": null,
    "gif_url": null,
    "id": "<id>",
    "status": "pending",
    "thumbnail_url": null,
    "video_url": null,
    "video_url_caption": null
  },
  "message": "Success"
}

{
  "code": 100,
  "data": {
    "callback_id": null,
    "caption_url": null,
    "duration": null,
    "error": {
      "code": 40119,
      "detail": "Video is too long (> 3600.0s). Please upgrade your plan to generate longer videos",
      "message": "Video is too long"
    },
    "gif_url": null,
    "id": "<id>",
    "status": "failed",
    "thumbnail_url": null,
    "video_url": null,
    "video_url_caption": null
  },
  "message": "Success"
}
When the video generation is complete, the status will change to completed , and you will receive the video's URL.
📘
The video file URL you get will expire in 7 days. 📆
You can observe this expiration in the URL parameters. Every time you call the video status endpoint, the
Expiresand other queries are regenerated accordingly.
Download the video
Congratulations! You've successfully generated your avatar video. Download and enjoy your creation. Once your video is ready, you can find a link in the response for you to download the video.
Bash
curl <video_url> --output output.mp4
For more guides on create video endpoint, explore:
- Create Personalized Avatars with Photos
- Customize Video Background
- Using Audio Source as Voice
- Create Videos with Your Personal Avatar and Voice
Conclusion
In this step-by-step guide, you've learned how to generate avatar videos using the HeyGen API. By selecting an avatar and a voice, you can create engaging videos for various purposes. Keep experimenting and create amazing content!
__Updated 5 months ago
Ask AI
Customize Video Background
Source: https://docs.heygen.com/docs/customize-video-background Generated: 2025-09-18 10:44:29
With HeyGen you can create videos with custom backgrounds. You can choose from Color , Image or Video sources as the background. To do this you need to change the "Background Settings " type to the appropriate option.
Learn more about Video Translate
Color Background
See detailed API reference
To select the background as color , you need change the background type to color. Then enter a color hex code in the value field.
RequestResponse
curl -X POST https://api.heygen.com/v2/video/generate \
-H 'X-Api-Key: <your-api-key>' \
-H 'Content-Type: application/json' \
-d '{
  "video_inputs": [
    {
      "character": {
        "type": "avatar",
        "avatar_id": "Brain_public_pro4_20230613",
        "avatar_style": "normal"
      },
      "voice": {
        "type": "text",
        "input_text": "With HeyGen, it is very easy to create avatar videos with custom backgrounds.",
        "voice_id": "d7bbcdd6964c47bdaae26decade4a933"
      },
      "background": {
        "type": "color",
        "value": "#FAFAFA"
      }
    }
  ]
}'

{
  "code": 100,
  "data": {
    "video_id": "<video_id>"
  },
  "message": "Success"
}
You can also set the color code to #008000 if you want to create green screen videos.
Image Background
See detailed API reference
To select the background as image , you need change the background type to image. Then you need to provide either url for external image url or image_asset_id for image asset from HeyGen.
RequestResponse
curl -X POST https://api.heygen.com/v2/video/generate \
-H 'X-Api-Key: <your-api-key>' \
-H 'Content-Type: application/json' \
-d '{
  "video_inputs": [
    {
      "character": {
        "type": "avatar",
        "avatar_id": "Brain_public_pro4_20230613",
        "avatar_style": "normal"
      },
      "voice": {
        "type": "text",
        "input_text": "With HeyGen, it is very easy to create avatar videos with custom backgrounds.",
        "voice_id": "d7bbcdd6964c47bdaae26decade4a933"
      },
      "background": {
        "type": "image",
        "image_asset_id": "<asset_id>"
      }
    }
  ]
}'

{
  "code": 100,
  "data": {
    "video_id": "<video_id>"
  },
  "message": "Success"
}
Video Background
See detailed API reference
To select the background as video , you need change the background type to video. Then you need to provide either url for external videos or video_asset_id for video assets from HeyGen.
Learn more about AI video avatar
You can also specify video playback style with play_style. Supported values are fit_to_scene, freeze, loop, once.
RequestResponse
curl -X POST https://api.heygen.com/v2/video/generate \
-H 'X-Api-Key: <your-api-key>' \
-H 'Content-Type: application/json' \
-d '{
  "video_inputs": [
    {
      "character": {
        "type": "avatar",
        "avatar_id": "Brain_public_pro4_20230613",
        "avatar_style": "normal"
      },
      "voice": {
        "type": "text",
        "input_text": "With HeyGen, it is very easy to create avatar videos with custom backgrounds.",
        "voice_id": "d7bbcdd6964c47bdaae26decade4a933"
      },
      "background": {
        "type": "video",
        "video_asset_id": "<asset_id>",
        "play_style": "loop"
      }
    }
  ]
}'

{
  "code": 100,
  "data": {
    "video_id": "<video_id>"
  },
  "message": "Success"
}
__Updated 4 months ago
Ask AI
Using Audio Source as Voice
Source: https://docs.heygen.com/docs/using-audio-source-as-voice Generated: 2025-09-18 10:44:31
To use audio source as voice, first you need to set your voice type as audio and then provide either an audio_url or an audio_asset_id in the "Voice Settings ".
- Use an Existing Audio Asset from HeyGen: You can select an audio asset directly from HeyGen's library to integrate into your video.
- Provide a Custom Audio URL: If you have a specific audio source you'd like to use, you can provide a custom audio URL.
Create Your Video
Now that your voice settings are in place, proceed with creating your video. Make sure to provide either an audio_url or an audio_asset_id.
Read more AI video generation
RequestResponse
curl -X POST https://api.heygen.com/v2/video/generate \
-H 'X-Api-Key: <your-api-key>' \
-H 'Content-Type: application/json' \
-d '{
  "video_inputs": [
    {
      "character": {
        "type": "avatar",
        "avatar_id": "Monica_inSleeveless _20220819",
        "avatar_style": "normal"
      },
      "voice": {
        "type": "audio",
        "audio_asset_id": "<asset_id>"
      },
      "background": {
        "type": "color",
        "value": "#008000"
      }
    }
  ]
}'

{
  "code": 100,
  "data": {
    "video_id": "<video_id>"
  },
  "message": "Success"
}
Also Read free audio to video convertor online
__Updated 4 months ago
Ask AI
Generate Video from Template
Source: https://docs.heygen.com/docs/generate-video-from-template-v2 Generated: 2025-09-18 10:44:36
Templates enable you to add and customize existing text, images, videos, audios, voices and avatars, while avatar videos consist only of avatars without these elements. If you plan to use it within a workflow and need richer content, AI video templates are likely a better fit for your use case compared to simple talking avatar videos. 🌟
Quick Comparison:
- Avatar Videos: Avatar videos are centered around avatars delivering content without any additional elements. They are ideal for straightforward, avatar-focused communication.
- Template Videos: In contrast, template videos offer a wide canvas for creativity. They enable you to customize existing text, images, videos, audios, voices and avatars seamlessly. If you need a richer, more versatile content format for your workflow, templates are the perfect choice.
Quick Start
Let's get started quickly to see how to create a template, add placeholders, and create a new video by dynamically changing these placeholders using the Template API.
Creating Template through the Interface
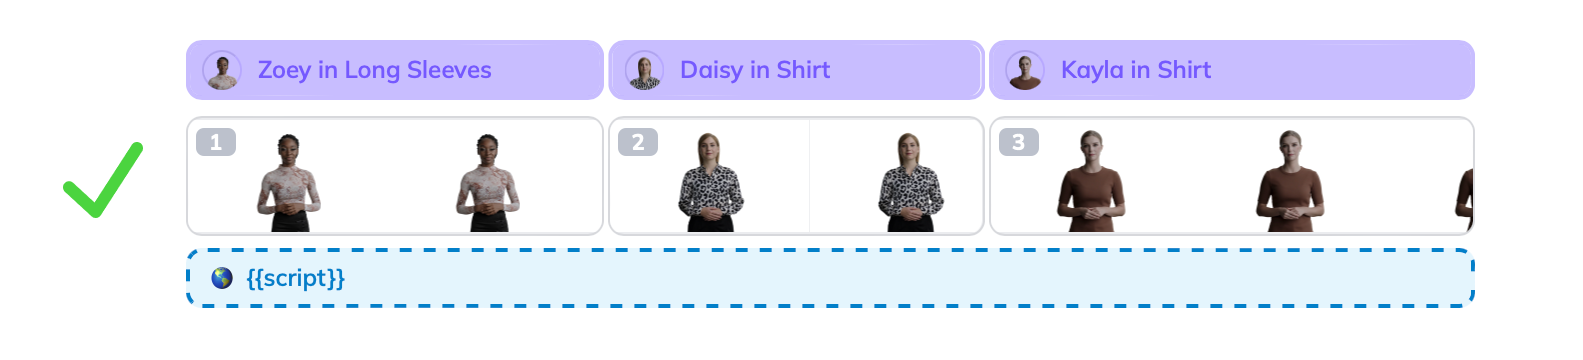
To create templates, visit HeyGen Template page and click on Create Template. After that, add a placeholder in your template by using double curly brackets {{}}.
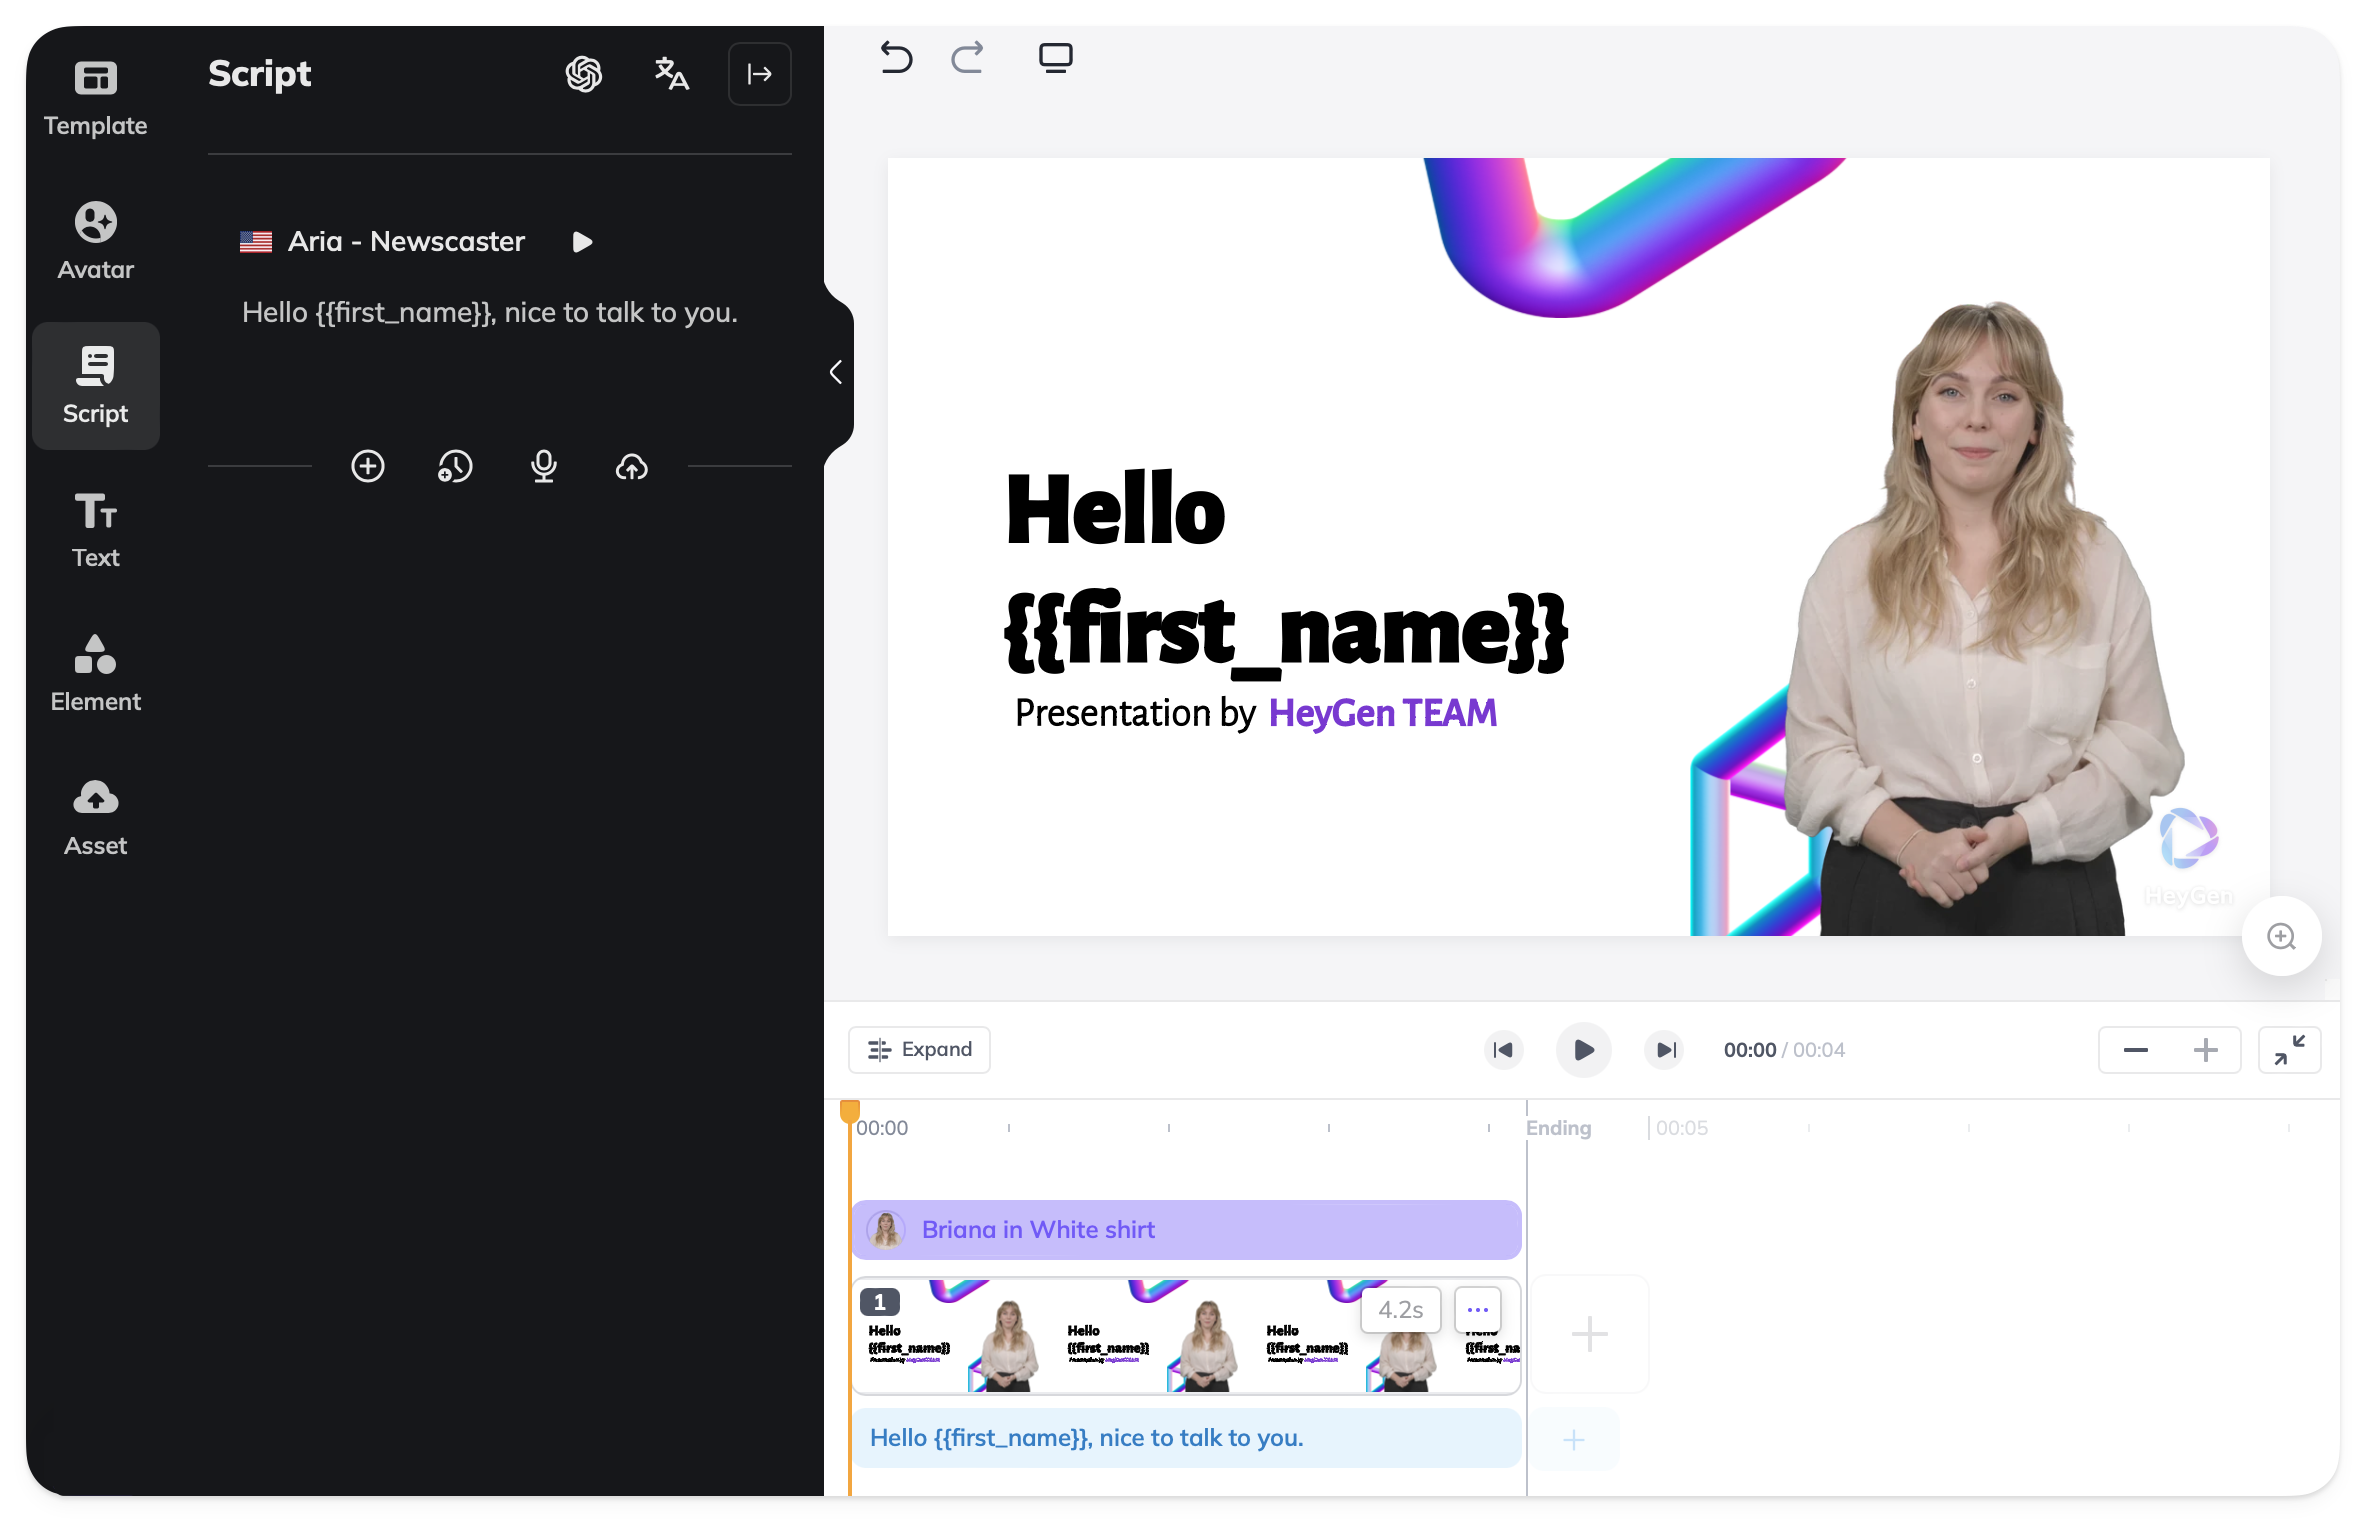
As shown, we've placed a {{name}} placeholder within our scene and script. In this tutorial, we'll set a value for this placeholder using the Template API and create a new video.
When using your template in the API, certain guidelines must be followed. See
Get a List of Your Templates
See detailed API reference
Using the following API request you will get a list of your templates that you have created in the HeyGen interface, obtain your template_id from here.
RequestResponse
curl --location 'https://api.heygen.com/v2/templates' \
     --header 'accept: application/json' \
     --header 'x-api-key: <your-api-key>'

{
  "error": null,
  "data": {
    "templates": [
      {
        "template_id": "<template_id>",
        "name": "<name>",
        "thumbnail_image_url": "<thumbnail_image_url>"
      },
      ...
    ]
  }
}
Retrieve Video Elements
See detailed API reference
To retrieve video elements for a specific template, use this API request to get the variable you want to change.
RequestResponse
curl --location 'https://api.heygen.com/v2/template/<template_id>' \
     --header 'accept: application/json' \
     --header 'x-api-key: <your-api-key>'

{
  "error": null,
  "data": {
    "variables": {
      "name": {
        "name": "name",
        "type": "text",
        "properties": {
          "content": ""
        }
      }
    }
  }
}
Modify Template Elements and Generate Video
See detailed API reference
To change template elements and generate videos, you will need to submit an API request as follows. In the request body, specify the elements you want to modify by providing the appropriate object within the variables section.
RequestResponse
curl --location 'https://api.heygen.com/v2/template/<template_id>/generate' \
     --header 'X-Api-Key: <your-api-key>' \
     --header 'Content-Type: application/json' \
     --data '{
  "caption": false,
  "title": "New Video",
  "variables": {
    "first_name": {
      "name": "first_name",
      "type": "text",
      "properties": {
        "content": "John"
      }
    }
  }
}'

{
  "error": null,
  "data": {
    "video_id": "<video_id>"
  }
}
You will receive a video_id after your request. To check the video's status and retrieve further details, you can use the video_status API endpoint.
RequestResponse (Completed)Response (Processing)Response (Pending)Response (Failed)
curl --request GET \
     --url https://api.heygen.com/v1/video_status.get?video_id=<video_id> \
     --header 'Accept: application/json' \
     --header 'X-Api-Key: <your-api-key>'

{
  "code": 100,
  "data": {
    "callback_id": null,
    "caption_url": "<caption_url>",
    "duration": 1.234,
    "error": null,
    "gif_url": "<gif_url>",
    "id": "<id>",
    "status": "completed",
    "thumbnail_url": "<thumbnail_url>",
    "video_url": "<video_url>",
    "video_url_caption": null
  },
  "message": "Success"
}

{
  "code": 100,
  "data": {
    "callback_id": null,
    "caption_url": null,
    "duration": null,
    "error": null,
    "gif_url": null,
    "id": "<id>",
    "status": "processing",
    "thumbnail_url": null,
    "video_url": null,
    "video_url_caption": null
  },
  "message": "Success"
}

{
  "code": 100,
  "data": {
    "callback_id": null,
    "caption_url": null,
    "duration": null,
    "error": null,
    "gif_url": null,
    "id": "<id>",
    "status": "pending",
    "thumbnail_url": null,
    "video_url": null,
    "video_url_caption": null
  },
  "message": "Success"
}

{
  "code": 100,
  "data": {
    "callback_id": null,
    "caption_url": null,
    "duration": null,
    "error": {
      "code": 40119,
      "detail": "Video is too long (> 3600.0s). Please upgrade your plan to generate longer videos",
      "message": "Video is too long"
    },
    "gif_url": null,
    "id": "<id>",
    "status": "failed",
    "thumbnail_url": null,
    "video_url": null,
    "video_url_caption": null
  },
  "message": "Success"
}
📘
The video file URL you get will expire in 7 days. 📆
You can observe this expiration in the URL parameters. Every time you call the video status endpoint, the
Expiresand other queries are regenerated accordingly.
Here is the result:
Explore the guides below for detailed information on how to modify and customize template content:
- ✏️ Replace Text Element and Script in Template (Here)
- 🖼️ Replace Image in Template
- 🎥 Replace Video in Template
- 👩💼 Replace Avatar in Template
- 🗣️ Replace Text/Voice in Template
- 🔈 Replace Audio in Template
- 🔄 Swap Image and Video in Template
- 🔳 Fit Property in Template
- ▶️ Video Playback Styles in Template
Quick Guides:
Template Scene Guidelines
There are certain guidelines to follow when using your template in the API. The new AI Studio allows your script to span multiple scenes. While users can save their templates as desired, to use the template in the API, scripts must be contained within a scene, or scenes must be contained within a script.
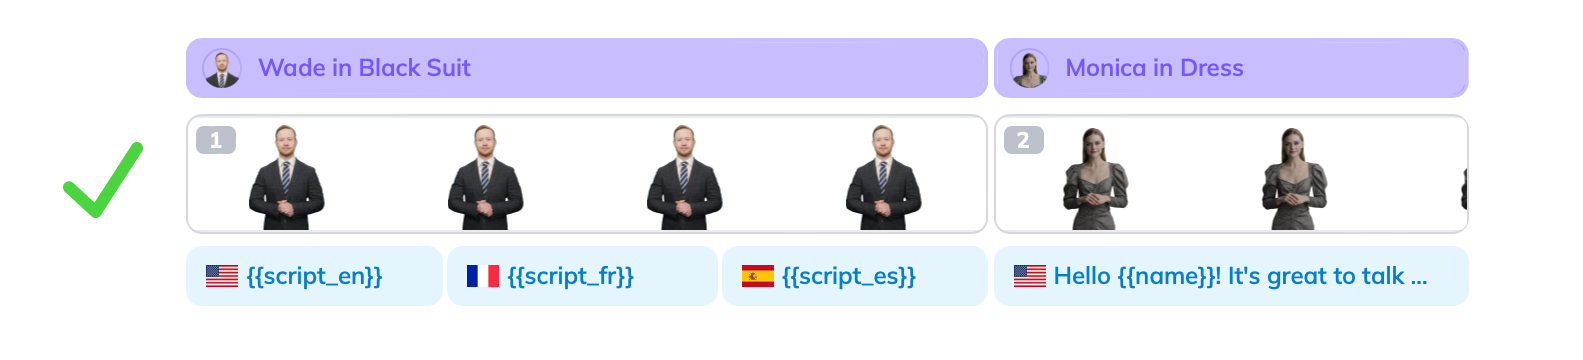
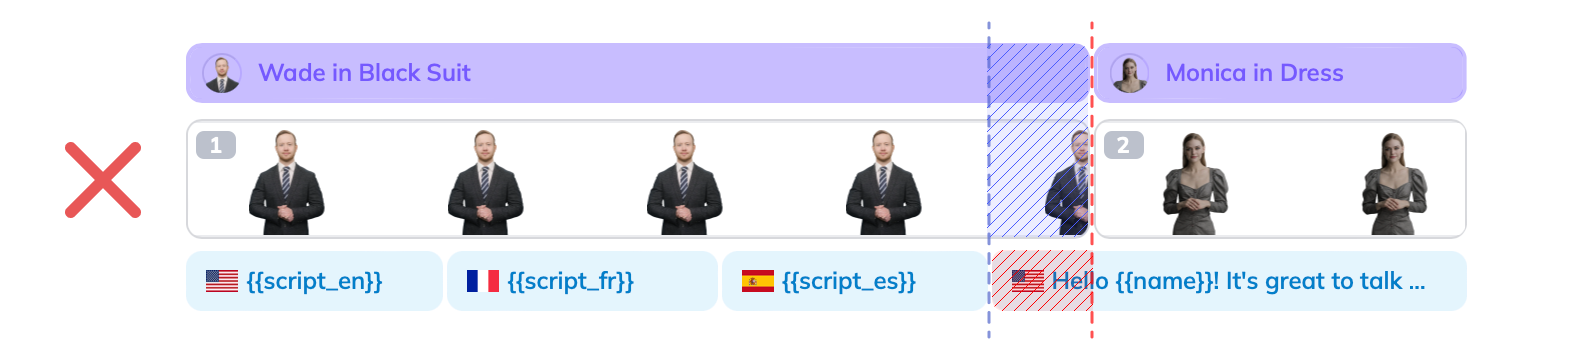
Failure to adhere to these guidelines will result in the "
End of scene 1 does not align with script" error.
Conclusion
In summary, HeyGen's Template API empowers users to effortlessly generate customized videos from templates. The process begins with creating a template through the web interface. Users can then use this template to generate tailored videos, replacing variables as needed. This approach provides a versatile tool for video creation and personalization. So, whether your goal is to captivate your audience or communicate your message more effectively , templates offer the versatility you need to succeed.
__Updated 4 months ago
Ask AI
Video Translate API
Source: https://docs.heygen.com/docs/video-translate Generated: 2025-09-18 10:44:39
Testing or trial access is not available for the Video Translate API.
Request Body
| Field | Type | Description |
|---|---|---|
| video_url | str | The URL of the video file to be translated. Supports direct video file URLs, Google Drive URLs, and YouTube URLs. |
| title | str (optional) | Title of the video. |
| output_language | str | The target language in which the video will be translated. Cannot be used together with output_languages. |
| output_languages | List[str] (optional) | A list of multiple target languages to translate the same video in a single request. Enables faster batch processing. |
| translate_audio_only | bool (optional) | Translate only the audio, ignore the faces and only translate the voice track in this video. default: false |
| speaker_num | int (optional) | Number of speakers. |
| callback_id | string (optional) | A custom ID for callback purposes. |
| enable_dynamic_duration | bool (optional) | Enable dynamic duration, which stretches or shrinks portions of your video to enhance conversational fluidity and translation quality between languages with different speaking rates. |
| brand_voice_id | string (optional) | A Brand Voice that gets incorporated to the translation. |
| callback_url | string | |
| (optional) | An optional callback url. This is useful if your callback endpoint is dynamic and each video have it's separate callback url. | |
| Using webhook endpoint is still recommended because those offers more customizations on the callback endpoint such as secrets, and event filtering, etc |
Response
| Field | Type | Description |
|---|---|---|
| video_translate_id | str | ID of the video. |
__Shell __Node __Ruby __PHP __Python
Click Try It! to start a request and see the response here!
Streaming API Overview
Source: https://docs.heygen.com/docs/streaming-api Generated: 2025-09-18 10:44:42
Streaming API Overview
HeyGen's Streaming API allows developers to seamlessly integrate dynamic Interactive Avatars into their applications for immersive user experiences. With this API, you can display an Interactive Avatar in a real-time setting to create virtual assistants, training simulations, and more, utilizing low-latency communication between users and Interactive Avatars with the power of WebRTC.
Quick Start
For a quick start, you can use our Interactive Avatar Demo GitHub repository. or install our SDK NPM Package. directly to your project. Please see the GitHub projects for installation instructions.
Streaming API vs. SDK
When deciding where to start, choose based on your development environment:
- Streaming SDK : If you're developing in a Node.js environment, start with the Streaming SDK for a easier integration.
- Streaming API (LiveKit approach) : If you need to develop for different environments, devices, or platforms , start with the Streaming API , which utilizes LiveKit, works in any WebRTC-compatible setup.
More Information
For more information about the Streaming API, please read our Interactive Avatar 101 Help center article.
About the Streaming Protocol
The Streaming API leverages the WebRTC (Web Real-Time Communication) protocol to ensure low-latency, secure communication between browsers and applications. This foundational technology offers advantages including low latency , cross-browser compatibility , data security , and scalability. For detailed information on WebRTC, visit the WebRTC website or WebRTC API page on MDN.
Use Cases
From interactive e-learning and gaming to virtual customer support and immersive entertainment , Interactive Avatars have the potential to transform industries.
Creating a Custom Interactive Avatar
You can create your own Interactive Avatar on HeyGen and use it with the Streaming API! Go to HeyGen Labs and click Create Interactive Avatar to get started.
Here is an instructions video for filming the footage!
Conclusion
In summary, the Streaming API empowers developers to create dynamic and interactive experiences by embedding Interactive Avatars into apps and websites of all kinds. Whether you're building virtual assistants, customer support, or immersive training simulations,HeyGen API offers the tools needed to bring avatars to life within your applications, marking a significant advancement in user engagement and interactivity.
__Updated 4 months ago
Ask AI
Streaming Avatar SDK
Source: https://docs.heygen.com/docs/streaming-avatar-sdk Generated: 2025-09-18 10:44:44
Overview
The @heygen/streaming-avatar allows developers to integrate real-time, AI-powered avatars into their applications. Using HeyGen's platform, you can control avatars through live streaming sessions, allowing them to speak, respond to commands, and interact with users via WebSockets. This SDK simplifies the process of connecting to HeyGen’s streaming services and handling avatar interactions programmatically.
Key Features
- Real-time Streaming: Connect and control avatars in live sessions using WebSockets for seamless communication.
- Text-to-Speech Integration: Send text commands to avatars, allowing them to speak in real-time with customizable voices.
- Event-Driven Architecture: Capture key events, such as when the avatar starts or stops speaking, and use them to trigger updates in your application.
- Session Management: Easily create, manage, and terminate avatar sessions programmatically.
- Choose Avatars: Choose avatars, adjust their quality, and customize their voice settings.
For a practical demonstration of how to use the Streaming Avatar SDK, check out our Next.js demo. This demo showcases the capabilities of the SDK in a Next.js environment, providing a comprehensive example of avatar integration.
Getting Started
To get started with the Streaming Avatar SDK , install the TypeScript package from npm and add your HeyGen API Token to your project.
Installation
To install the Streaming Avatar SDK, use npm:
Shell
npm install @heygen/streaming-avatar livekit-client
Basic Usage
Here’s a simple example of how to create a streaming session and send a task to an avatar:
TypeScript
import { StreamingAvatar } from '@heygen/streaming-avatar';

const avatar = new StreamingAvatar({ token: 'your-access-token' });

const startSession = async () => {
  const sessionData = await avatar.createStartAvatar({
    avatarName: 'MyAvatar',
    quality: 'high',
  });

  console.log('Session started:', sessionData.session_id);

  await avatar.speak({
    sessionId: sessionData.session_id,
    text: 'Hello, world!',
    task_type: TaskType.REPEAT
  });
};

startSession();
Managing Sessions
The SDK provides comprehensive session management features, including starting, stopping, and controlling avatar sessions. You can handle session details, such as checking if the session is active, tracking the session duration, and managing multiple avatars simultaneously.
Event Handling
The SDK uses an event-driven architecture to handle various avatar interactions. You can listen for key events such as when an avatar starts talking, stops talking, or when the stream is ready for display. This allows you to dynamically update your application based on real-time avatar behavior.
SDK API Reference
For API reference, you can refer to this page: Streaming API SDK Reference.
Learn more about AI Video Avatar
Conclusion
The Streaming Avatar SDK empowers developers to integrate real-time, AI-driven avatars into their applications with ease. By leveraging HeyGen's platform, you can create interactive, engaging experiences with customizable avatars, real-time text-to-speech, and seamless session management.
__Updated 4 months ago
Ask AI
Firewall Configuration
Source: https://docs.heygen.com/docs/firewall-configuration Generated: 2025-09-18 10:44:49
To ensure smooth operation of HeyGen’s Interactive Avatar (powered by LiveKit), your corporate network firewall needs to allow traffic to specific hosts and ports. This guide outlines exactly what to open up for signal and media traffic.
⸻
🚪 What Needs Access?
LiveKit uses WebSocket (WSS) and WebRTC (TLS/DTLS) protocols over both TCP and UDP. All connections are encrypted.
✅ Minimum Required (For Basic Functionality)
| Host | Port | Purpose |
|---|---|---|
*.livekit.cloud |
TCP 443 | Secure signaling via WebSocket |
*.turn.livekit.cloud |
TCP 443 | TURN over TLS - fallback when UDP is blocked |
*.host.livekit.cloud |
UDP 3478 | TURN/UDP for establishing peer-to-peer connections |
*://api.heygen.com |
TCP 443 | Avatar API and Signaling via WebSocket and HTTPS |
🌟 Recommended (For Best Performance)
To achieve optimal video/audio quality, allow the following optional traffic:
| Host | Port | Purprose |
|---|---|---|
| all hosts | UDP 50000-60000 | WebRTC media traffic |
| all hosts | TCP 7881 | WebRTC fallback over TCP |
Also:
• ✅ Enable UDP hole-punching (if supported)
• ❌ Avoid symmetric NAT if possible
🔒 Wildcards Not Allowed?
If your corporate firewall does not support wildcard domains (like *.livekit.cloud), you’ll need to allow traffic to specific hostnames.
Please visit: https://docs.livekit.io/home/cloud/firewall/ for latest list of hostnames, replace with heygen-feapbkvq.
🛠️ IT Notes
• TLS encryption (port 443) ensures secure media and signaling.
• UDP is strongly recommended for low-latency audio/video performance.
• If UDP is blocked, TURN over TCP (443) will be used as a fallback but may degrade quality.
Additional Troubleshooting Tools:
Test Browser Compatibility: https://livekit.io/webrtc/browser-test
Test Connections:
- Using the response from: https://docs.heygen.com/reference/new-session#response, take note of the url and access_token.
- Enter in url and access_token here: https://livekit.io/connection-test
__Updated about 2 months ago
Ask AI
Interactive Avatar API - Avatar Version Deprecation Notice
Source: https://docs.heygen.com/docs/interactive-avatar-api-avatar-version-deprecation-notice Generated: 2025-09-18 10:44:50
Effective immediately, HeyGen Interactive Avatar API v1 and v2 versions have been deprecated and are no longer supported. All sessions must use v3 or higher versions to ensure optimal performance and access to the latest features.
⚠️ Changes
- ❌ Avatar Version v1 - No longer supported
- ❌ Avatar Version v2 - No longer supported
- ✅ Avatar Version v3+ - Recommended and supported
Error Response Updates
When attempting to use deprecated avatar versions, you will receive one of the following errors:
WebRTC Signaling API Error
Signal Server Error Code
{
  "code": 10003,
  "message": "avatar version is deprecated, please update to v3+",
  "details": "invalid avatar"
}
WebRTC Media API Error
Media Sever Error Code
{
  "code": 400014,
  "message": "Avatar version is deprecated, please update to v3+",
  "status": 400
}
🛠️ Support
If you need assistance with migration:
contact support: https://www.heygen.com/contact-us
Note: This change is part of our ongoing effort to improve the Interactive Avatar experience. We appreciate your understanding and cooperation in this transition.
__Updated about 2 months ago
Ask AI
Bulk Video Translation
Source: https://docs.heygen.com/docs/bulk-video-translation Generated: 2025-09-18 10:44:55
Bulk Video Translation Script Guide
This guide will walk you through setting up Python, updating the script for your bulk video translation needs, and running it to generate a results CSV file with translation IDs.
1. Installing Python
Before running the script, ensure that Python is installed on your system.
Windows
- Download Python: Visit python.org/downloads and download the latest version of Python for Windows.
- Install: Run the installer and check the box “Add Python to PATH” during installation.
- Verify Installation: Open Command Prompt and type:
Bash
python --version
You should see a version number indicating Python is installed.
macOS
- Download Python: Go to python.org/downloads and download the latest version for macOS.
- Install: Open the downloaded package and follow the installation instructions.
- Verify Installation: Open Terminal and run:
Bash
python3 --version
Linux
- Using Package Manager: Most Linux distributions come with Python pre-installed. To check, open Terminal and type:
Bash
python3 --version
- If not installed: Use your package manager (e.g., on Ubuntu):
Bash
    sudo apt update
    sudo apt install python3
2. Preparing the Script
You can copy the below code and save it to your computer as a text file. Name it 'BulkTranslationScript.py ', as the rest of the guide assumes that that is the name of the script file.
import os
import csv
import requests

print("Current working directory:", os.getcwd())

def main():
    csv_file = "bulk_translation_csv_template.csv"
    output_csv_file = "bulk_translation_results.csv"
    api_url = "https://api.heygen.com/v2/video_translate"
    api_key = "YOUR_API_KEY_HERE"

    headers = {
        "accept": "application/json",
        "content-type": "application/json",
        "x-api-key": api_key,
    }

    results = []  # List to store each row's result

    with open(csv_file, mode="r", newline="", encoding="utf-8") as file:
        reader = csv.DictReader(file)
        # Prepare fieldnames for the output CSV, ensuring "translation_id" is included.
        fieldnames = reader.fieldnames + ["translation_id"] if reader.fieldnames else ["translation_id"]

        for row in reader:
            title = row["title"]
            output_language = row["output_language"]
            video_url = row["url"]
            folder_id = row.get("folder_id", "").strip()  # Optional folder_id

            # Build the payload without filtering by a specific language
            payload = {
                "video_url": video_url,
                "title": title,
                "output_language": output_language,
                "translate_audio_only": False,
                "enable_dynamic_duration": "true"
            }

            # Include folder_id in the payload only if provided
            if folder_id:
                payload["folder_id"] = folder_id

            try:
                response = requests.post(api_url, headers=headers, json=payload)
                response.raise_for_status()  # Raise an exception for HTTP errors
                response_data = response.json()
                translation_id = response_data.get("translation_id", "")
                print(f"Success for video '{title}':", response_data)
            except requests.exceptions.RequestException as e:
                translation_id = ""
                print(f"Error processing video '{title}':", e)

            # Add the translation_id to the row and store it in results
            row["translation_id"] = translation_id
            results.append(row)

    # Write the results to a new CSV file
    with open(output_csv_file, mode="w", newline="", encoding="utf-8") as outfile:
        writer = csv.DictWriter(outfile, fieldnames=fieldnames)
        writer.writeheader()
        writer.writerows(results)

    print(f"Results saved to {output_csv_file}")

if __name__ == "__main__":
    main()
Modifying the Script File
- API Key: The script sets the API key in line 10. Replace that API Key with your HeyGen API key from https://app.heygen.com/settings?nav=Subscriptions
Python
api_key = "YOUR_API_KEY_HERE"
📘
HeyGen API Key Credits
Each minute of video translated consumes 3 HeyGen API Credits. Go to www.heygen.com/api-pricing to find the API plan that has enough API credits to meet your content translation needs.
3. Setting Up Your CSV File
The Translation Script will run based off of values that you provide in a csv file.
- You can copy this Google Sheet template to go off of.
- Ensure your CSV template (named
bulk_translation_csv_template.csv) includes at least the following columns:- title: The title of the video.
- output_language: The language for the translation.
- url: The URL of the video.
- folder_id: (Optional) The folder ID to group translations.
- The url field needs to be a public video download url. This can be in a location like Google Drive, or YouTube, or AWS S3 bucket. However, it needs to be public; that is, if you copy this URL and enter it in an incognito browser window, the video should open up without any log-in or password necessary.
Example CSV row:
csv
title,output_language,url,folder_id
"Sample Video","Spanish","https://example.com/video.mp4","12345"
4. Installing Required Python Libraries
The script uses the built-in csv and os modules and the requests library. If you don’t have requests installed, run:
Bash
pip install requests
5. Running the Script
Navigate to the Script Directory:
- Open your Command Prompt (Windows) or Terminal (macOS/Linux).
- Change to the directory where your script is located:
Bash
cd path/to/your/script
Execute the Script:
- Run the script using Python:
Bash
python BulkTranslationScript.py
On macOS or Linux, if necessary:
Bash
python3 BulkTranslationScript.py
Script Execution:
- The script will read the CSV template, send translation requests for each video, and print the API responses.
- All responses will be recorded with an added "translation_id" column.
Reviewing Results:
- After execution, check the newly created file
bulk_translation_results.csvin the working directory. It contains all the original CSV data along with the new "translation_id" from the API response.
- After execution, check the newly created file
6. Troubleshooting & Additional Tips
- Error Messages: If you encounter errors, check that all dependencies are installed and that your CSV file is correctly formatted.
- Environment Variables: For better security, consider storing your actual API key in an environment variable rather than modifying the script.
- Script Customization: Backup the original script before making any changes.
- Help & Community: If you run into issues, online communities such as Stack Overflow can provide helpful advice.
By following this guide, you can efficiently use the Bulk Video Translation Script to process your videos, obtain translation IDs, and have your results neatly saved in a CSV file. Enjoy your streamlined translation workflow!
__Updated 4 months ago
Ask AI
HeyGen OAuth
Source: https://docs.heygen.com/docs/heygen-oauth Generated: 2025-09-18 10:44:57
📘
Before you can connect your app to HeyGen with OAuth, you'll need to be approved.
Please fill out this Integrations Intake form to apply to become a HeyGen Integration partner. Our Partnerships team will review your submission and get in contact.
Welcome to the HeyGen OAuth 2.0 integration guide. With this guide, you'll learn how to securely connect your app with HeyGen's platform using the industry-standard OAuth 2.0 protocol. OAuth 2.0 enables your application to access HeyGen resources on behalf of users without handling their sensitive credentials directly, ensuring a seamless and secure experience.
Also Read HeyGen’s integration
This guide will walk you through the authentication flow, explain the roles of authorization and token endpoints, and provide best practices to maintain high security standards. Whether you're building a new application or integrating OAuth 2.0 into an existing one, this documentation is designed to help you implement robust and efficient user authentication and authorization quickly.
Let's get started on integrating your app with HeyGen!
__Updated 4 months ago
Ask AI
HeyGen MCP Server
Source: https://docs.heygen.com/docs/heygen-mcp-server Generated: 2025-09-18 10:44:58
🧠 Guide: Introducing the HeyGen MCP Server
The HeyGen MCP (Model Context Protocol) Server is an open-source tool designed to streamline how developers manage dynamic context for AI avatars and conversations. Built to work seamlessly with HeyGen’s Video Generation API!
🔗 Website : heygen.com/model-context-protocol
💻 GitHub : github.com/heygen-com/heygen-mcp
🛠 What Does It Do?
Watch this video for a quick walkthrough of the HeyGen MCP Server installed in Claude Desktop:
🚀 Quick Start
Check out our GitHub for full installation instructions!
💡 Why Use MCP?
Using the MCP Server helps you:
- Create persistent, personalized AI conversations.
- Easily switch between multi-user or multi-avatar scenarios.
- Offload memory and context handling logic from your app.
📦 Features
- 🔁 Listing Avatars and Voices
- 🧩 Generating Videos
- 🧠 Checking for sufficient API credits
Let us know your feedback at https://docs.heygen.com/discuss!
__Updated 5 months ago
Ask AI